配置文件nokFreeBSD上搭建大型网站(Nginx代理服务器篇)ipr
七、 P orxy服务器配置
Proxy服务器 192.168.10.20主要是负责终端客户的接入为两台Squid缓存服务器提供均衡负载。现在我们就开始吧
服务器网络配置
#ee/etc/rc.confifconfig_lnc0="inet 192.168.10.20 netmask 255.255.255.0"de faultrouter="192.168.10.10"hostname="proxy.rd.bj"
#ee/etc/hosts
192.168.10.20 proxy.rd.bj
#ee/etc/resolv.confnameserver 192.168.10.40
网络环境配置好后我们开始安装Nginx在那里告诉我
#whereis nginxnginx: /usr/ports/www/nginx
#make config
#make showconfig #我的配置选项
===>The following configuration options are available for nginx-0.5.34:
DEBUG=off"Enable nginx debugging"
HTTP_MODULE=on"Enable HTTP module"
HTTP_ADDITION_MODULE=on"Enable http_addition module"
HTTP_DAV_MODULE=on"Enable http_webdav module"
HTTP_FLV_MODULE=on"Enable http_flv module"
HTTP_PERL_MODULE=on"Enable http_perl module"
HTTP_REALIP_MODULE=on"Enable http_realip module"
HTTP_REWRITE_MODULE=on"Enable http_rewrite module"
HTTP_SSL_MODULE=on"Enable http_ssl module"
HTTP_STATUS_MODULE=on"Enable http_stub_status module"
HTTP_SUB_MODULE=on"Enable http_sub module"
MAIL_MODULE=off"Enable IMAP4/POP3/SMTP proxy module"
MAIL_IMAP_MODULE=off"Enable IMAP4 proxy module"
MAIL_POP3_MODULE=off"Enable POP3 proxy module"
MAIL_SMTP_MODULE=off"Enable SMTP proxy module"
MAIL_SSL_MODULE=off"Enable mail_ssl module"
WWW=on"Enable html sample files"
===>Use'make config' to modify these settings
#make install clean
又开始等待了. . .
终于完了现在开始配置吧
#cd/usr/local/etc/nginx
#ee nginx.conf#更改配置文件
我更改后的配置文件如下user www www;worker_processes 1;error_lo g/var/lo g/nginx_error.lo g;pi d /var/run/nginx.pi d;events {use kqueue;worker_connections 65535;
}http{include mime.types;default_type application/octet-stream;log_format main'$remote_addr-$remote_user[$time_local]$request ''"$status"$body_bytes_sent "$http_referer" '
'"$http_us er_agent" "$http_x_forwarde d_for"';access_log/var/log/nginx_access.log main;client_header_timeout 3m;client_body_timeout 3m;send_timeout 3m;sendfile on;tcp_nopush on;tcp_nodelay on;keepalive_timeout 65;client_header_buffer_size 1k;large_client_header_buffers 44k;output_buffers 1 32k;postpone_output 1460;gzip on;gzip_min_length 1100;gzip_buffers 48k;gzip_types text/plain;
upstream mysvr {server 192.168.10.30:3128 weight=5;server 192.168.10.31:3128 weight=5;
}s erver {listen 80;s erver_name www.rd.bj;charset gbk;access_log/var/log/nginx_host.access.log main;location/ {proxy_pass http://mysvr/;proxy_redirect off;proxy_set_header Host$host;proxy_set_header X-Real-IP$remote_addr;proxy_set_header X-Forwarded-For$proxy_add_x_forwarded_for;client_max_body_size 10m;client_body_buffer_size 128k;proxy_connect_timeout 90;proxy_send_timeout 90;proxy_read_timeout 90;proxy_buffer_size 4k;proxy_buffers 432k;proxy_busy_buffers_size 64k;proxy_temp_file_write_size 64k;
}location/nginx{stub_status on;access_log on;auth_basic "Nginx Status";auth_basic_user_file /usr/local/etc/nginx/htpasswd;
}
}
}
保存配置文件退出后现在对刚才设置的文件进行验证。
#rehash
#nginx-t
2007/12/2715:42:52[info]25243#0: the configuration file/usr/local/etc/nginx/nginx.conf syntax is ok2007/12/2715:42:52[info]25243#0: the configuration file/usr/local/etc/nginx/nginx.conf was tested successfully
Very good没问题了我们在配置文件中还设置了查看Nginx的状态信息所以现在我们还必需生成一个htppas swd文件这时候我们得用到Apache的htpas swd工具了 我们这台代理服务器上没有Apache现在只能依靠web服务器的了去那生成一个复制过来。
生成htppasswd文件的方法
#htpasswd-c/tmp/htpassswd nginx
输入两次密码就完成了然后把生成好的htpasswd文件拷贝到proxy的机器的/usr/local/etc/nginx目录下就行了。
如何在两台机器之间拷贝文件呢 s cp出场了. . .
#scp/tmp/htpassswd root@192.168.10.20:/usr/local/etc/nginx
好了 现在万事具备了现在启动她吧
#nginx
#ps -aux|grep nginxroot 8040.03.449084288??Ss 4:49PM 0:00.00 nginx:master process nginx(nginx)www 8050.013.8 1800417404??S 4:49PM 0:00.02 nginx:worker process (nginx)root 8070.00.3 536 416 p0 RL+ 4:49PM 0:00.00 grep nginx
现在用浏览器查看一下N ginx的状态 http://192.168.10.20/nginx输入用户名和密码进入如图
- 配置文件nokFreeBSD上搭建大型网站(Nginx代理服务器篇)ipr相关文档
- 配置文件精品FreeBSD搭建大型网站架构的实验环境(Nginx代理服务器篇)
- 配置文件[中学]FreeBSD上搭建大型网站(Nginx代理服务器篇)
- 代理[原创]代理服务器网站
- 重庆FreeBSD搭建大型网站架构的实验环境(Nginx代理服务器篇)
- 重庆FreeBSD搭建大型网站架构的实验环境(Nginx代理服务器篇)(5页)
- 事件【大型网站技术实践】初级篇:借助Nginx搭建反向代理服务器
虎跃云-物理机16H/32G/50M山东枣庄高防BGP服务器低至550元每月!
虎跃科技怎么样?虎跃科技(虎跃云)是一家成立于2017年的国内专业服务商,专业主营云服务器和独立服务器(物理机)高防机房有着高端华为T级清洗能力,目前产品地区有:山东,江苏,浙江等多地区云服务器和独立服务器,今天虎跃云给大家带来了优惠活动,为了更好的促销,枣庄高防BGP服务器最高配置16核32G仅需550元/月,有需要的小伙伴可以来看看哦!产品可以支持24H无条件退款(活动产品退款请以活动规则为准...

Central美国65折优惠,美国达拉斯机房VPS季付赠送双倍内存
Central美国独立日活动正在进行中,旗下美国达拉斯机房VPS 65折优惠,季付赠送双倍内存(需要发工单),Central租用的Hivelocity的机房,只支持信用卡和加密货币付款,不支持paypal,需要美国独服的可以谨慎入手试试。Central怎么样?Central便宜服务器,Central自称成立于2019年,主营美国达拉斯机房Linux vps、Windows vps、专用服务器和托管...
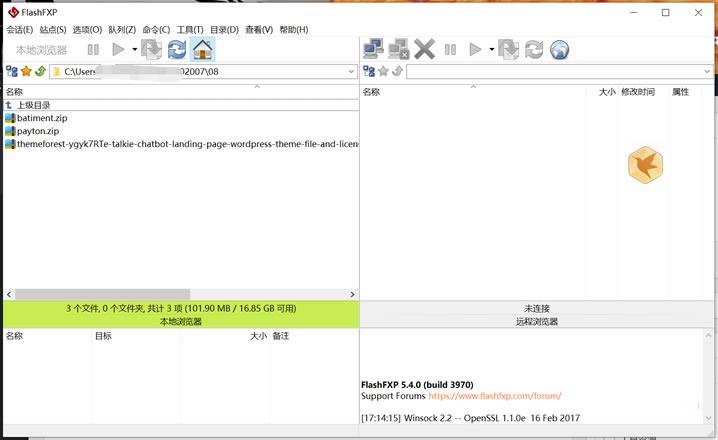
FlashFXP FTP工具无法连接主机常见原因及解决办法
目前,我们都在用哪个FTP软件?喜欢用的是WinSCP,是一款免费的FTP/SFTP软件。今天在帮助一个网友远程解决问题的时候看到他用的是FlashFXP FTP工具,这个工具以前我也用过,不过正版是需要付费的,但是网上有很多的绿色版本和破解版本。考虑到安全的问题,个人不建议选择破解版。但是这款软件还是比较好用的。今天主要是遇到他的虚拟主机无法通过FTP连接主机,这里我就帮忙看看到底是什么问题。一...
-
bluestacksbluestacks怎么用?彩信中心短信中心的号码是多少xp系统停止服务XP系统停止服务后电脑怎么办?lockdowndiphone4s 完美越狱5.1.1时出现Could not connect to lockdownd。求救啊!!商标注册查询官网如何在网上查询商标是否注册?iphone6上市时间苹果六什么时候出的网站优化方案网站优化方案如何写?宽带接入服务器目前常见宽带接入的方式有哪几种网站营运网站运营都分为哪些方面液晶显示器电源维修谁知道液晶显示器电源板 维修大约要花多少钱?清华同方的。